
- You are here:
- Home »
- Blog »
- Dog Obedience »
- How to Teach a Dog to Heel: Complete Training Guide for Perfect Leash Walking
How to Teach a Dog to Heel: Complete Training Guide for Perfect Leash Walking
Introduction
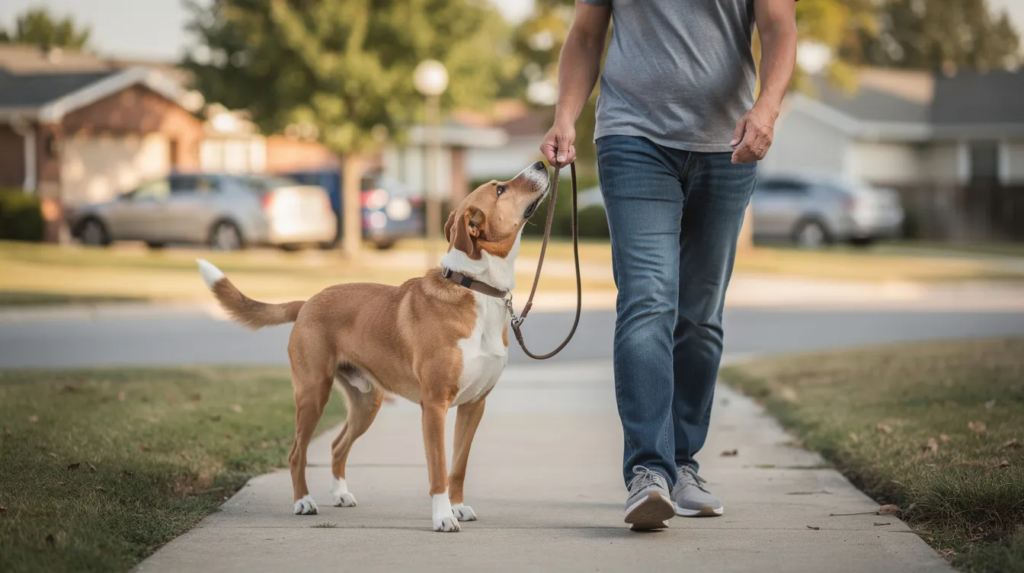
Teaching a dog to heel means walking calmly right by your side-shoulder aligned with your leg, matching your pace and direction without pulling, lunging, or lagging. It’s one of the most practical obedience skills any dog owner can teach, and this guide walks you through every step of the process, from the very first stationary exercise to confident heeling through real-world distractions.
This guide covers basic to advanced heel training methods for dog owners of all experience levels. Whether you have a young puppy just learning leash manners or an older dog with years of pulling habits, you’ll find a structured approach here. We won’t cover off-leash work or competition-level heeling-this is focused on practical, everyday control that makes walks safer and more enjoyable for both you and your dog.
The direct answer: Teaching heel requires consistent positioning on your left side, positive reinforcement with high-value treats, and a gradual progression from stationary exercises to walking in motion. Most dogs can learn a reliable indoor heel in two to four weeks with daily practice.
Here’s what you’ll gain from this guide:
- Correct heel position and why precise alignment matters
- The difference between formal heel and loose leash walking
- Proven attention and focus techniques that prevent pulling
- A week-by-week training protocol you can start today
- Solutions for the most common heel training challenges
Understanding Heel Command Fundamentals
The heel command asks your dog to walk immediately beside you, maintaining a specific position through starts, stops, and directional changes. Unlike a casual walk where the dog can wander and sniff, heel demands full attention to the handler and precision in movement. Understanding these fundamentals creates the foundation for everything that follows in your training.
Proper Heel Position
The heel position is beside the handler’s left side. Your dog’s shoulder should align with your left leg, their body running parallel to yours, with their head oriented forward or slightly upward to watch you. Your left hand typically holds the leash while your right hand delivers treats near your hip.
This positioning isn’t arbitrary. It originates from military and working dog traditions-historically, dogs walked on the handler’s left so that equipment or ejected shells wouldn’t strike them. More practically, consistent left-side positioning gives you better control in traffic, around other dogs, and in crowded spaces. When your dog understands exactly where to place their body, communication becomes clearer and walks become more predictable. A clear focal point during training increases a dog’s confidence, and knowing precisely where “heel” is gives your dog that clarity.
Heel vs. Loose Leash Walking
Formal heel and loose leash walking are often confused, but they serve different purposes. In loose leash walking, your dog can be ahead, behind, or beside you-sniffing, looking around-as long as the leash stays slack. Heel is stricter: specific side, shoulder alignment, matching speed and trajectory, full attention on the handler.
Think of it this way: loose leash walking is for enjoyment and exploration; heel is for moments requiring control-crossing busy streets, passing reactive dogs, navigating crowds. Most experts recommend heeling only when necessary, allowing loose leash walking or free sniff time for the rest of the walk. Walking entirely in heel is mentally exhausting for a dog and isn’t natural or healthy long-term. The two skills complement each other, and teaching heel actually improves your dog’s overall leash manners because it builds the attention and impulse control that carry over into casual walking.
With these fundamentals in place, let’s move into the practical methods that help your dog learn heel position step by step.

Basic Heel Training Techniques
Now that you understand proper positioning, it’s time to start building the behavior. Heel training follows a logical progression: first your dog learns where to be while standing still, then they learn to focus on you, and finally they learn to maintain both while moving. Teach heel in a distraction-free indoor space using high-value treats-this sets your dog up for success before the real world adds complexity.
Stationary Heel Position
Start with your dog sitting beside you on your left side. Use treats to guide your dog into the heel position: hold a treat in your right hand near your left hip, and lure the dog into place. The moment their shoulder aligns with your leg, mark the behavior with a “yes” or a clicker and reward immediately.
Practice this stationary positioning until your dog snaps into place reliably. Build duration gradually-first a few seconds, then ten, then thirty. If your pup breaks position, simply reset without frustration. Reward frequently at first to reinforce good leash behavior, then begin fading the frequency as your dog understands the expectation. Say “good girl” or offer enthusiastic praise each time they hold position. This patience in the early stage pays off enormously later.
Focus and Attention Training
Before adding movement, teach your dog to look up at you on cue. The “Heads Up” method improves focus during heeling by giving your dog a clear focal point-your face or a treat held near your chin. Dogs trained with a focal point show better focus and understand heel position better.
Start by holding a treat near your face, saying “watch,” and rewarding eye contact the instant it happens. Practice in short bursts indoors where nothing competes for your dog’s attention. Positive reinforcement increases a dog’s motivation to focus, so keep giving treats and praise generously. Regular practice is essential for building reliable focus in dogs. This attention work is what ultimately prevents pulling and jumping when distractions appear-your dog learns that checking in with you is more rewarding than chasing squirrels.
First Steps in Motion
With stationary positioning and eye contact solid, take your first step. Literally one step. With your dog in heel position, step forward with your left foot, immediately stop, and reward if your dog moved with you and stayed aligned. Use a standard 4-to-6-foot leash to teach heel-it gives enough slack for natural movement without allowing your dog to wander far.
Gradually increase to two steps, then three, then five. Treat after every successful sequence at first. Introduce the verbal cue “heel” as you begin moving, pairing it with a hand gesture (like patting your left thigh). Practice engaging activities like turns or speed changes to keep the dog focused. This keeps things fun and prevents the repetition from becoming boring for both of you. Training sessions should be fun to maintain a dog’s attention-if your dog loses interest, you’ve gone too long without a reward or a break.

Step-by-Step Heel Training Protocol
Building on these basic techniques, here’s a structured week-by-week plan that takes your dog from first steps to reliable outdoor heeling. Keep sessions to 10–15 minutes, end on a successful note, and allow sniff breaks between repetitions. Training sessions should be fun to enhance the owner-dog relationship, and frequent play sessions improve the bond during training.
Week 1–2: Foundation Building
- Teach prerequisite commands. Ensure your dog reliably responds to “sit” and “stay”-these are the building blocks. If your dog can’t hold a sit, heel becomes much harder.
- Practice stationary heel positioning. Multiple times daily, lure your dog into position at your left side, mark, and reward. Use lots of treats and verbal praise to reinforce the correct position until it becomes automatic.
- Introduce the “heel” verbal cue with a hand signal. Begin pairing the word with the position so your dog starts associating the cue with the behavior. Your voice should be clear and consistent.
- Master single-step heel with immediate reward. Take one step, stop, reward. Repeat until your dog moves with you reliably 80–90% of the time indoors.
Building a relationship requires physical and emotional interaction, so mix in play, belly rubs, and encouragement throughout these early sessions. Positive reinforcement builds a strong bond between owner and dog-this foundation matters as much as the mechanical skill.
Week 3–4: Movement Integration
- Progress to 5–10 steps maintaining heel position. Gradually extend the distance before rewarding. Your dog should hold position and pace for increasingly longer stretches.
- Add directional changes. Practice left turns, right turns, and about-turns. These keep your dog guessing and encourage them to watch you rather than forge ahead.
- Practice varying speeds. Walk slowly, then at normal pace, then faster. Your dog should adjust their pace to match yours-this builds true attentiveness.
- Introduce brief stops with automatic sit. When you stop, your dog should sit at your left side without being asked. This takes effort and repetition, but it’s a hallmark of solid heel training.
Move training outdoors during this phase-start in a quiet backyard, then progress to a low-traffic sidewalk. Gradually increase distractions during training as the dog improves. Target about a 70% success rate in mildly distracting outdoor environments by week four. Training should occur in distracting locations for better results once your dog has the indoor basics down, but don’t rush it.
Training Method Comparison
| Method | Best For | Timeline | Difficulty |
| Treat Lure Method | Food-motivated dogs, beginners | 2–4 weeks | Beginner |
| Clicker Training | Precise timing, shaping complex behaviors | 3–6 weeks | Intermediate |
| Prong Collar Method | Strong pullers (professional guidance required) | 1–3 weeks | Advanced |
The treat lure method is the most accessible: use food to lure your dog into position, then gradually fade the lure so the dog responds to the verbal cue alone. It works beautifully for most pet dogs and is easier for first-time trainers.
Clicker training adds precision. The click marks the exact moment your dog does something right, which accelerates learning for dogs that respond well to structured shaping. Janice Gunn, a renowned competitive obedience trainer, has achieved perfect scores with 9 different dogs, and her dogs score consistently above 198 in competitions; methods like the “Heads Up” heeling approach she champions provide a clear focal point that dramatically improves accuracy.
Prong collar methods can reduce pulling impulse quickly but carry welfare risks. A 2024 peer-reviewed study (Johnson & Wynne et al.) found that both prong collars and front-clip harnesses significantly reduced pulling impulse compared to martingale collars, but prong collars didn’t outperform harnesses on welfare indicators. Use positive reinforcement to reward correct behavior instead of punishment-research consistently supports this approach as safer and equally or more effective for non-competition dogs.
Choose your method based on your dog’s temperament, size, and your own experience level. For most owners, starting with treat lures and progressing to marker-based training offers the best balance of simplicity and results.
Common Heel Training Challenges and Solutions
Even with a solid protocol, you’ll encounter obstacles. These are the three most common things that stall progress-and what to do about each one.
Dog Forging Ahead or Pulling Forward
Firmly use the “become a tree” method if the dog pulls ahead on the leash. Stopping when the leash becomes tight teaches dogs to return attention to the owner. The moment your dog turns back or creates slack, immediately resume walking and reward. Frequent directional changes also prevent your dog from anticipating the path-turn left, turn right, do an about-face. This teaches your dog that charging ahead is pointless because the direction keeps changing.
For strong pullers, consider a front-clip harness. Research shows non-tightening front-clip harnesses offer the best balance of reducing pulling without undue discomfort. Breeds bred to pull, like huskies and Malamutes, have a stronger pulling impulse and need longer training periods with more frequent rewards. A study examining back-connection harnesses versus neck collars found that dogs pulled harder when wearing back-connection harnesses, so front-clip designs are the better choice for dogs that pull.
Lagging or Slow Response
If your dog drags behind or responds slowly, the issue is usually motivation. Increase the value of your treats-switch from kibble to chicken, cheese, or liver. Use enthusiastic voice and praise to encourage forward movement. Keep sessions shorter to prevent mental fatigue; it’s better to do three five-minute sessions than one fifteen-minute slog.
Also check that your dog isn’t experiencing discomfort from their collar or harness. Small dogs and puppies are especially susceptible to neck pressure, and dogs with respiratory issues need harnesses rather than collars. If an older dog suddenly starts lagging, a veterinary check is worthwhile-joint pain or other health issues can masquerade as training problems.
Distraction and Loss of Focus
When your dog can’t hold heel because they’re fixated on another dog, a squirrel, or a passing jogger, you’ve advanced too quickly. Step back to a less distracting environment and rebuild. Use your “watch” cue to redirect attention, and reward heavily when your dog chooses to look at you instead of the distraction.
Environmental management helps enormously: train during quieter times, increase your distance from triggers, and use sniff breaks as rewards between heel segments. Regular practice helps reinforce the heel behavior, and over time your dog’s ability to focus through distractions will expand. For reactive or aggressive dogs that lose focus around triggers, professional support through programs like a reactive dog training program can accelerate progress significantly.
Conclusion and Next Steps
Teaching your dog to heel is a matter of clear positioning, consistent positive reinforcement, and gradual progression. Start with stationary exercises, build attention and focus, add movement in small steps, and expand to real-world environments over several weeks. The effort you invest creates safer walks, a stronger bond, and a dog that’s a genuine pleasure to walk anywhere.
Here’s how to start today:
- Set up your training space. Find a quiet indoor area, grab high-value treats and a standard 4-to-6-foot leash.
- Practice stationary heel position. Spend 10 minutes luring your dog to your left side, marking, and rewarding.
- Build daily consistency. Commit to two or three short sessions per day-progress comes from regular practice, not marathon efforts.
- Track your progress. Note how many steps your dog can hold heel position before breaking-watching that number climb is incredibly motivating.
If you’re looking to go further, explore advanced obedience training to build on your heel work, or consider a board and train program for accelerated results with professional guidance. For puppies just starting out, structured puppy training establishes these skills early when they’re easiest to learn.
Additional Resources
- Recommended equipment: A front-clip Y-shaped harness for pullers, a flat collar for dogs already heeling well, a treat pouch worn at the hip, and a clicker for precise marking. Use a standard 4-to-6-foot leash rather than retractable leads.
- Professional training: Off Leash K9 Training Atlanta offers private lessons and structured obedience programs that include formal heel training, with options for every breed, age, and behavioral challenge-check out the trainers page to find the right fit.
- Persistent challenges: If your dog isn’t making progress after four weeks of consistent practice, or if pulling is accompanied by reactivity, lunging, or aggression, seek hands-on professional help. Some dogs need customized protocols that go beyond what any guide can provide.
Related Posts
Multi-Dog Household Training Tips: Complete Guide to Managing Multiple Dogs
When to Start Puppy Obedience Training: Complete Guide for Atlanta Dog Owners
What Is an E-Collar for Dogs: A Complete Guide to Electronic Training Collars
Signs of Stress in Dogs: Expert Guide to Recognizing and Managing Canine Anxiety
How to Stop Puppy Biting: Professional Training Guide for Atlanta Dog Owners
Dog Friendly Restaurants Atlanta: Complete Guide for Dining Out with Your Pup